Armpit Fudge – Prepping Another Brownies Activity

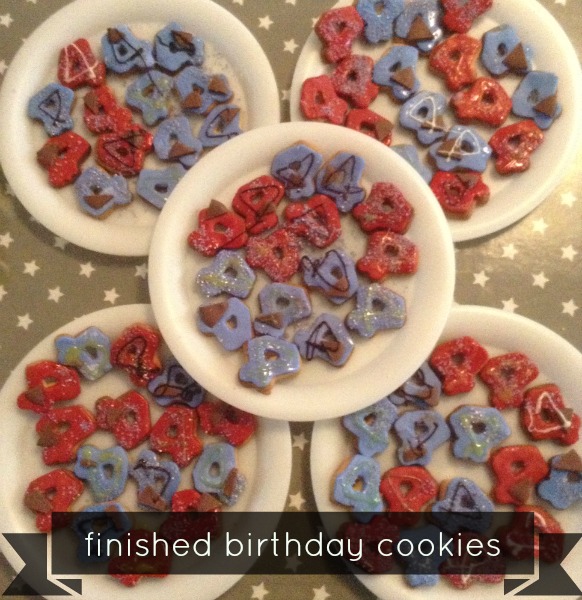
A Girlguiding (and probably Scouts too) staple has to be armpit fudge. It isn’t difficult to make, doesn’t take long and is doable with regular ingredients that you will probably have at home. Definitely worth a try, so we did.

Armpit fudge describes what it is pretty well. It’s a simple one, and is something that I’m considering for Brownies next term.. I may regret that.

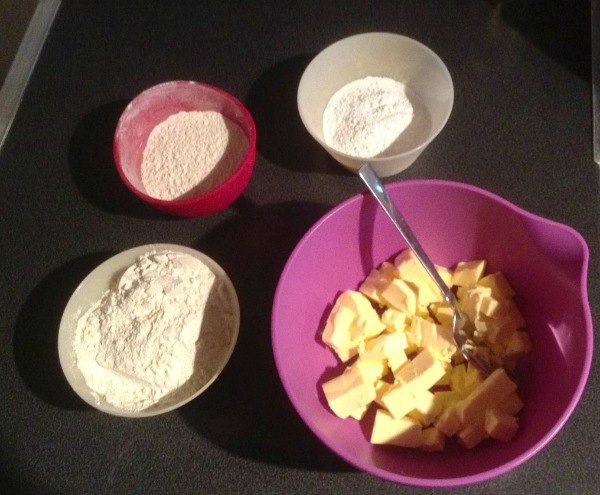
For each person you need :

2oz Icing Sugar
1 tablespoon Butter (we used Vitalite)
2 teaspoons Cream Cheese (we used Philadelphia)
Vanilla Essence (or whatever you have, we had errr Buttery Caramel)
2 teaspoons Cocoa.

Ikea bag for armpit fudge

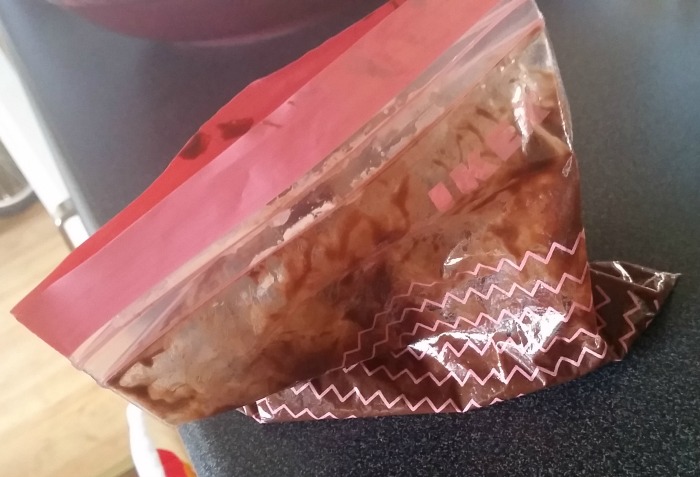
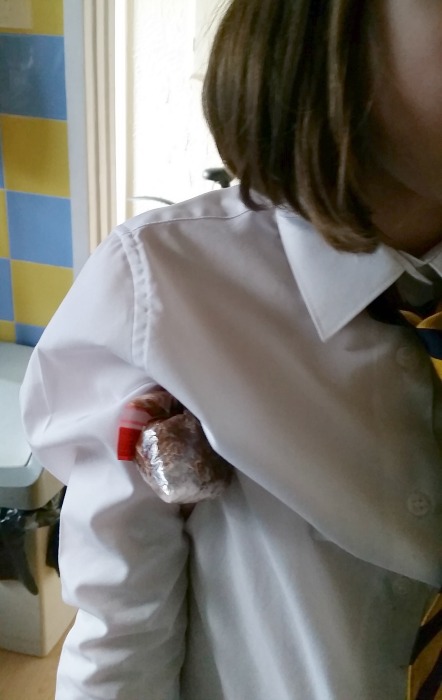
Get a ziplock bag. We had some Ikea ones so used the smallest size we had of those. Add each ingredient carefully into the bag. It gets messy… especially with the Icing Sugar and Butter.

Once everything has been added to the bag, squash all the air out and seal the bag. Give the bag a good squash. H told me she was “really tired” so she imagined it was like a fidget spinner but you could eat it… seemed to work.

armpit fudge in an armpit

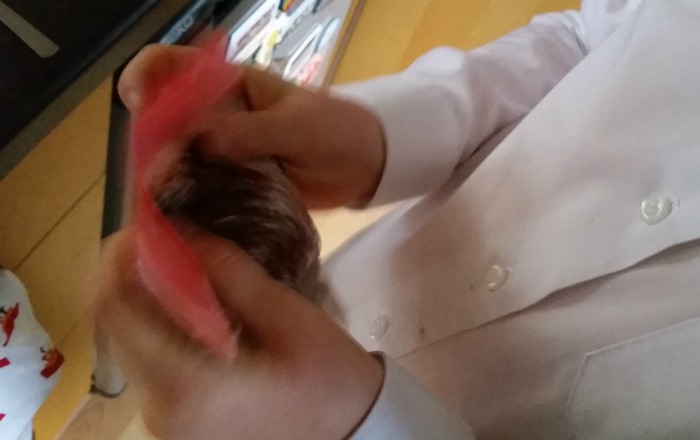
Once it is suitably squashed and mixed, stick it under your arm and give it even more of a squash. That’ll help too, the warmth of your underarm (ew!) makes it all mix together well. Check if it is creamy. If so, then you’re ready to add things like Smarties or Parma Violets or Skittles or the whole lot (we might have….).

squishing armpit fudge

Give the bag another good squish under your arm to make sure all the extras get covered. Yum.

armpit fudge ready to eat in Ikea bag

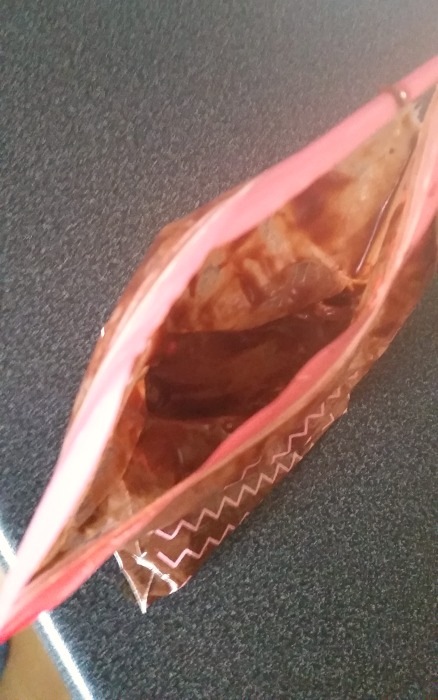
Then open and dip in with a spoon. Spoons are so much nicer to deal with than fingers… someone I know may have got armpit fudge over her glasses too…. wonder who…?

Armpit Fudge - eating it

The mixture works, the armpit fudge is sugary sweet without being too over the top. I now have to work out how this will work for over 30 7-10 year olds…

A Hearty Winter Soup

It is officially the coldest week this year. Considering this year is only five weeks old, I’ll take it. I also hope that will be it and things will only get warm from here onwards. Monday means swimming for H, which in turn means soup for tea, usually using up our vegetables and whatever else I can find. This week we’ve made a hearty winter soup.

My hearty winter soup is an easy one. We have our Morphy Richards Soup Maker – our second one which alas, is on its way out. The smooth soup function isn’t going so well, though this doesn’t stop us trying a nice chunky soup.

Hearty Literally Winter Soup

When I got to the cupboards they were looking a bit bare. One carrot, half a butternut squash and five medium sized potatoes were the only fresh vegetables we had. The broccoli had seen better days – and because this was chunky rather than blended ended up in the food waste.

Fortunately I had tinned lentils hidden away in the back of the cupboard for days like this. So here’s my hearty winter soup recipe. So easy with a soup maker.

1 carrot
5 medium sized potatoes
Half a butternut squash
Tinned lentils
Bouillon (low salt)
A pinch of sea salt (this might cancel out the previous entry)
Garam Masala

Well, you know how this goes. Peel and chop the veg- but this time into small cubes. Stick them in the soup maker. Add the whole tin of lentils to the mixture, and top up with water.

Add a tablespoon of the Bouillon to the mixture, and add a sprinkle of Garam Masala (if your child is fussy like H). Finally, a pinch of sea salt because it feels nice.

Stick your soup maker onto the chunky setting, and sit and browse the internet for 28 minutes.

Serve the hearty winter soup with a ciabatta, lightly toasted is good, and complain about how flipping freezing it is out there at the moment.

For all previous soup concoctions, everything is tagged souptastically souper.

a hearty winter soup with ciabatta

Butternut Squash Risotto with Bright Horizons

Now that the nights are getting darker and colder (and wetter) we’re having more time indoors as a family. Now H is seven she’s doing more around the house which is great – including cooking. After a bit of deliberation we decided to make a Butternut Squash Risotto from the Bright Horizons Cookbook.

butternut squash risotto recipe

Butternut squash risotto is pretty straightforward to make too.

Ingredients :
300g Butternut squash
20ml Vegetable oil
200g White onion
2 Garlic cloves
400g Risotto rice
1l water
400g Haricot beans
100g Fresh spinach
10g Fresh parsley

Instructions :
Set the oven to 200c/400f/Gas mark 6

h ready to make butternut squash risotto

Peel, deseed and dice the butternut squash. Coat it in half of the vegetable oil and lay onto a baking tray. Roast for approx 30 minutes until the pieces are soft.

add garlic to butternut squash risotto

Chop up the onion and crush the garlic. Heat the remaining oil in a saucepan and add the onion and garlic, sautéing until soft.

Add the risotto rice and mix well so it is coated in the oil. Pour in a third of the water (we added a stock cube to it) and bring the mixture to simmer. Cook until the liquid has absorbed.

add beans to butternut squash risotto

Keep adding water, a little at a time. Add the beans too (one tin should be the right amount). Keep cooking until the water is absorbed. Keep adding water until it has all been absorbed and the rice is cooked.

chop parsley for butternut squash risotto

Chop up the parsley. Stir in the roasted butternut squash, and add spinach and half of the parsley. Mix until the spinach has wilted.

add butternut squash to butternut squash risotto

Sprinkle the remaining parsley on top before serving.

We also added some Knorr Aromat All Purpose Seasoning right at the end.

butternut squash risotto

This recipe is taken from the Bright Horizons Family Cookbook, which has several family recipes which are suitable for younger ones to join in with too. H enjoyed taking charge, with Shaun making sure she didn’t do anything daft. (at one point she said “Mummy! Touch this pan to check how hot it is” – sigh)

The Butternut Squash risotto was excellent too – nice and filling and a great winter warmer. H was happy as she did loads to make it and I was happy as I didn’t have to make it!

We were sent a copy of the Family Cookbook from Bright Horizons, and a Doodle Apron for H to wear. You can find more family recipes from Bright Horizons here. These recipes have been used by a nursery who provide day care in Fulham.

Souptastically Souper Sweet Summer Soup

It’s been a while, but here we are, the middle of summer and yes, we’re still eating soup – and I’ve been experimenting over the last few months with a combination that I think works a treat – a Souper Sweet Summer Soup.

Souper Sweet Summer Soup served

My Souper Sweet Summer Soup is made with my Morphy Richards Soup Maker, pretty much on a weekly basis. We’re on our second maker now as the motor went on the first (we were offered a discount on a replacement one, but got a good deal via Argos in the end).

Every Wednesday H has swimming, and while her lesson is at 4.30, by the time we’re home it’s getting on for 5pm, and I really don’t fancy cooking. I like sweet soup, as does my little madam. Shaun isn’t so keen. So the good thing is this one tastes good but also works with some salty seasoning if you prefer savoury.

Also – it’s really easy.

Souper Sweet Summer Soup

For the Souper Sweet Summer Soup you need…
one butternut squash.
A handful of sweetcorn. I use frozen sweetcorn, but you can also use canned. I’ve used an entire can and can highly recommend!
One apple – the sweeter the better really.

Chop it all into cubes and add water to the lowest line inside the soup maker, and that’s that. I don’t even add any bouillon to it. Sweet soup isn’t to everyone’s taste, so if that’s you, just add salty seasoning when serving. Shaun says the Nando’s Peri-Peri salt works pretty well – and gives it a bit of a kick.

Serve with some freshly toasted naan (I use Weight Watchers ones) or pitta breads, and that’s pretty much it. Incredibly easy and really tasty. I’ve tried with two apples which makes it just a fraction too sweet, and I’m going to try with cauliflower very soon (maybe next week) as I think this combination could work!

H ate the lot too. So for that reason alone I can’t complain. I’ve been browsing at Amazon and can see Morphy Richards have a new soup maker out – this time you can pause it! That’s the one disadvantage you have with the maker I’ve got – so that’s on my to-get list for future reference.

We Came, We Saw, We Conker Pie’d…

Sorry, terrible pun. If you’re a regular reader here, you’ll see we’ve done a few bits with Higgidy pies, the latest being to let you know about their latest competition, to design a pie for them, as part of the Higgidy Recipe Hunt. Obviously we don’t get out of it, and lucky for us we were sent a Lakeland pie dish and blackbird, as well as a personalised rolling pin. So I can now officially reveal, our pie is a conker pie!

A conker pie?!” said most people, as we all know conkers are poisonous. So my disclaimer is, this pie does not contain conkers anywhere AT ALL. But H liked the name, and I’m sticking with it and it’s meant to look a bit like a pie which resembles a conker rather than actually being one.

Shaun is currently doing things dairy free, so you can adapt the Conker Pie recipe accordingly.

Conker Pie

For the pastry –
250g Plain Flour
110g Trex
a pinch of salt
some cold water.

Put the flour and salt in a bowl, and add the Trex (or butter) to the mixture, getting it into a breadcrumb-like consistency. Once you’ve achieved this, add the water to bind it all together, roll into a ball and wrap with clingfilm. Place in the fridge for 20 minutes to allow it to rest.

For the filling –
2 sweet potatoes
3 carrots
one bag of chestnuts – I got Gefen whole chestnuts which come roasted and peeled.

peel and dice the sweet potato and carrot and lay on a baking tray. Roast for around 15-20 minutes. I sprayed them lightly with some Frylight. Slice the chestnuts and put into a frying pan, adding some light curry powder, some cumin and a bit of garlic. Stir together, and once the other vegetables are finished in the oven, add those to the mixture. Finally, get a tin of lentils and add to the mixture, making sure they’re well drained. (you could also use split peas – I forgot to soak them, so I’ll try that next time)

Roll out the pastry. I found it was quite crumbly, possibly due to using Trex instead of butter. Paul Hollywood would not be happy. Actually, we found ourselves saying many times “what would they do on Bake Off?” and remembering. I rolled it to around 0.5cm thickness, with a lot of patching together as it was fairly dry and crumbly.

The filling is ready, but don’t forget the blackbird – put it in the middle of the pie dish to let steam out while cooking, and add the filling around it. Place the rolled out pastry on top, and carefully trim the sides to fit the dish. We also did the fork pattern around the edges for extra conker pie prettiness.

Conker Pie
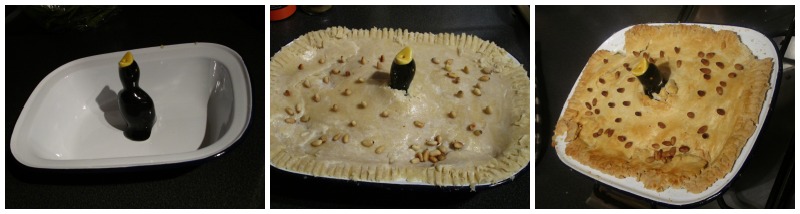
Finally, brush the top with milk (we used soya milk) and for the conker-like appearance, lightly fry some pine nuts in the frying pan used for mixing the vegetables until they’re slightly toasted, and put them onto the top of the pastry. Some stuck up and some fell over, but they had the spiky conker-like effect we were looking for.

Pop into the oven for 25 minutes at 180 degrees.

The Conker Pie should be a nice mixture of flavours and crunch without being too overbearing. The only thing I’d say went wrong with ours was the pastry – next time I’ll buy ready made which should make things a bit simpler. But overall it was a delicious pie, dairy free, and full of vegetables! Oh and it made for a nice Sunday dinner too… and there’s enough left for more tomorrow.

Conker Pie

We received some goodies from Higgidy for taking part in this challenge.

A Morrisons Summer Pudding

Morrisons have a price checker tool on their website, which helps identify low-priced everyday goods in-store. We got the ingredients together for a meringue treat for Shaun’s Fathers Day meal, so here are our Morrisons Summer Sweet Treats!

Fathers Day Meringue Sweet Treats

You need – Small meringue nests

Creme Fraiche

Fruit of any variety (we had cherries and blackberries as well as some tinned raspberries)

A chilled banana (important!)

sweet treats meringue nests

It’s a simple one to make, and one which Shaun took over what with it being his day, him being Australian and loving anything pavlova-esque.

Simply wash and prepare your fruit. We used the cherries and blackberries (which were on a multibuy deal) for the meringue decoration, so washed these. TOP TIP – to remove a cherry stone, use a piping nozzle – the larger the better and twist it into the cherry. It comes out every time and your cherry stays intact.

removing a cherry stone The creme fraiche doesn’t need any preparation as it’s nice and thick. We chose the Morrisons NuMe Less than 5% Creme Fraiche which comes in at 90p currently on the price checker. Spoon it onto the meringue nest carefully.

Add the fruit – we did two cherries and two blackberries, with the puree on top.

No meringue nest is complete without a fruity sauce to drizzle over the top, so I put the majority of the raspberries from a tin of Morrisons Raspberries in Juice into a blender and gave it a good whizz around. (which comes in on the price checker at £1.14) I like my purees to have a kind of ice cream type of texture, so added half of the chilled banana – it makes such a difference cold rather than straight from the bowl too. Blend again. Sweet Treats - meringue nests

Chill in the fridge until it’s time to eat.

Prep time is around five minutes, chill time as long as you want (though I’d make it as close as possible to when you plan to eat it), the meringues also lasted approximately five minutes too!

Morrisons Meringue Nest


So that’s our Morrisons Summer pudding.

I was quite pleased to see that Morrisons intend to start deliveries in London by the middle of this year – I’m signed up and ready for the alert – hopefully it’ll be soon!

This post is an entry for the #MorrisonsMum Summer Recipe eBook Challenge sponsored by Morrisons, which has recently cut prices on over a thousand every day products. Find out more here: price checker tool

Banoffee Pie

To celebrate H turning four and a half we made Banoffee Pie. Ever since it featured on The Great British Bake-Off, Shaun and H have been wanting to make it, but we’ve wanted a nice simple recipe so H could help too.

Banoffee Pie isn’t difficult to make. Here are the ingredients :

One pack of digestive biscuits (250g crushed)
100g butter
Can of Carnation Caramel
300ml Whipping Cream
Three bananas
Chocolate for topping (grated)

Banoffee PIe base

Crush the biscuits – these are going to be the base of the pie. Melt the 100g butter and add to the crushed biscuit base to make a solid base. Grease a 20cm tin with butter, and press the mixture into the tin to form the pie base.

Leave to set in the fridge for 30 minutes.

Banoffee Pie chop banana

After 30 minutes bring the base out of the fridge and add the Carnation Caramel. Chop the banana into slices and place on top of the Caramel.Banoffee PIe place banana

Whip the cream lightly until it forms soft peaks. Add bananas (if you think it’s a good idea – we did). Spoon this onto the top of your pie.

Banoffee Pie cream

Place in the fridge to chill for a bit longer.

Banoffee Pie Cream Top

Grate the chocolate and once your pie is ready to eat, sprinkle on top. This last step can be tricky as for some reason our grater had a weird static reaction with the chocolate so it went flying everywhere!

After that, eat.

This was nice and simple to make, the only cooking involved was melting the butter, so a perfect one for H to do the majority of!

Banoffee Pie

This recipe is based on this one from the Carnation Website and takes approximately 15 minutes (without taking the 30 minutes chilling in between) to make.

(Didn’t Hurt A) Reindeer Pizza – Kids Party Snacks

It’s our NCT Christmas gathering tomorrow and we always like to take along something different. This year I think we’ve a good one – reindeer pizza.

reindeer pizza Reindeer pizza isn’t difficult to make, in fact, you may have already seen a gingerbread reindeer variation which did the rounds a few weeks ago simply by turning your gingerbread man upside down and decorating it differently.

We like cake but sometimes you need a break – especially as there’s so much sugary stuff on offer right now. Fortunately we love pizza. So we made some reindeer pizza.

reindeer pizza

Our dough was made in the breadmaker and makes five reindeer. Once ready you prep the dough and simply cut the shapes and decorate. We have a large gingerbread man shape from our 101 Cookie Cutters set which are a good size.

Even better, it’s vegetarian, you’ve got some vegetables on there, so while it isn’t the healthiest of snacks it isn’t cake.

For the dough in the breadmaker (made according to the Panasonic SD-256 instructions) you need the following :
1/2 tsp yeast
300g (11oz) strong white flour
1 tbsp olive oil
1 tsp salt
170ml water

Add to the breadmaker in that order and put it onto the Pizza Dough setting. 45 minutes later you will have your dough. Knead it and roll it and cut the gingerbread man shapes.

To make your shape look reindeer-like you need to add various vegetables – red pepper for the mouth, a Rudolph-esque cherry tomato for the nose, two olives for the eyes and yellow pepper for the antlers. Use passata for the sauce and mozzarella for the top.

reindeer pizza Bake in the oven at 220°c/425°f/Gas Mark 7 for 15-20 minutes on a tray lined with baking paper.

For pudding the kids are having mince pie ice cream – as made in our ice cream maker. It’s pretty yummy too…

Link up your recipe of the week
(this post contains an affiliate link up there)

A Back To School Big Hug Of A Soup

I have no idea why I’m calling it this, all the relief and tension of the last few weeks disappeared this morning sending H off to school, which means I can think about evening meals properly again and have a little bit more time in the evenings. Here’s our Back To School Big Hug Of A Soup.

a big hug of a soup

I needed a Big Hug Of A Soup tonight. I tried to think of all the comfort foods I’d turn to, without thinking about chocolate or things which will make me big. Soup works and it’s quick. I concocted a soup which just works, autumnal and warmer now that the hot days are coming to an end. I’ve got into the trap of making easy soups with a butternut squash so I left it out this time. It’s a Big Hug Of A Soup. Oh yes. (I think if it were possible to add chocolate it really would hug you too)

So: ingredients. A lot of this is what’s left in the cupboard the day before our food delivery, and of course it is prepared in our trusty Morphy Richards Soup Maker.

Two sweet potatoes
One red onion
One red pepper
One clove of garlic
Two sticks of celery (this may be pointless but we have lots that need to be used, so may as well)
A blob of Aussiemite (this may not be necessary but I put it in anyway)
Five carrots
Some ginger. (by some, I mean however much you’d actually like, you want the flavour to come through in the soup)

Seasoning – a bit of curry powder and a bit of bouillon (by a bit, I put in a teaspoon but you may like more if you need a more salty flavour to it).


This may sound like a flavour-clash, but it actually works pretty well. I set the Soup Maker to smooth, and added the maximum amount of liquid so it wouldn’t be too thick. Once it was finished I added in some pre-cooked small pasta shells (a handful, not too much) and some edamame beans. Once the soup was ready we had to pop out for twenty minutes, so by the time we got home it had cooled nicely and the flavours had come through – I could taste the ginger, it was nice and subtle. For me, the mixture of vegetables is a good portion size and easily a couple of your five a day.

I would recommend making the Big Hug Of A Soup at least 30 minutes before you intend to eat it and serve with a nice crusty loaf of bread (I was lazy and bought a Giraffe Loaf from the supermarket). One big reassuring hug of a soup for those of us who just got through our first day of school, whether you’re a parent or a child. We all ate ours, anyway.

This post contains three very content and full stomachs and one affiliate link.

Birthday Cookies

H had her fourth birthday party yesterday, and one thing I had in mind to make was birthday cookies.

Birthday cookies are easy to make, you can bake tons of them and share them with the parents (parents are often overlooked when it comes to party food) and depending on allergies could be adapted for children who have nut allergies pretty easily by avoiding ready made icing.

Birthday Cookies - Finished

Here’s the recipe.

Birthday Cookies.

1 cup icing sugar

2 cups plain flour

300g unsalted butter

For the icing:

Two Sainsburys roll-it-out coloured icing blocks. Yes, I cheated.

For the decoration :

Sainsburys icing pens (various colours) and some blue sugar decoration crystals (they’re nice and sparkly like monster snot).

Birthday Cookies Ingredients

To make the cookies :

Soften the butter, add the icing sugar and stick in the food processor until blended. Add the flour. You’ll have your dough. Leave in the fridge for 20 minutes.

After that, on a floured board roll out the dough and using a cookie cutter cut your shapes. We used a number 4 from my 101 Cookie Cutters set (they didn’t have any monsters) and made approximately 60 cookies.

Bake in the oven at around 180 degrees for 10-15 minutes (we have a fan-assisted oven) – keep checking them and turn your tray around. I found the best cookies were made on the bottom shelf as they looked a nice golden shade.

birthday Cookies baked

Once out of the oven leave to cool on a wire rack for 10-15 minutes (just enough time for the next batch to be added).

Once your batch are cooled, get your icing. I went for ready-made as it saved me time, I used icing sugar to dust the boards and rolled them out cutting 4 shapes again, and sticking them to the cookie with water.

Birthday Cookies Iced

Once they’d dried I used more water on top and added various decorations. As it was a monster themed party I figured it could be fairly messy so broke up some chocolate buttons and added them on top, as well as writing with the icing pens.

The best thing? Almost everyone ate them so it meant we didn’t bring much home at all. There were plenty for everyone too (18 children and a few more adults).

H loved them as they were proper birthday cookies with her age on as well, and I quite enjoyed making them as it kept me calm and stopped me flapping.

I think we all win there.

This post contains an affiliate link, and the recipe was put together using several recipes online for inspiration. I wanted to avoid too much sugar and also eggs.