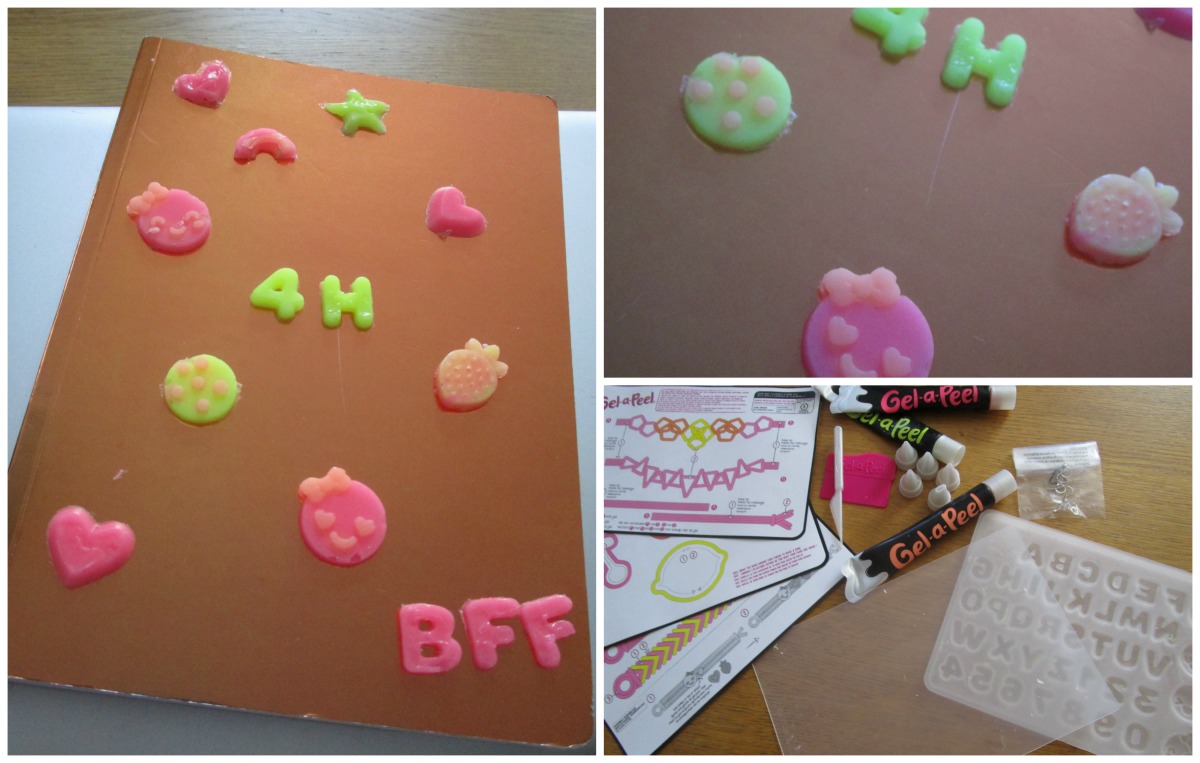
We have been sent a Gel-a-Peel kit, something I hadn’t heard of but was curious to try. Now H is 8 this is an ideal craft activity for her, she just needs to learn to be patient!
Gel-a-Peel is a simple concept. We received three tubes of different coloured gels, three nozzles for the gels, plus two additional nozzles. You also get a scraper and a tool to help get the aforementioned gel out of the nozzles. As well as this there are some metal attachments if you want to make earrings.
You also receive a tray which has various moulded shapes on it, including the alphabet. There’s a clear sheet which you create your designs on , copying from the templates you can place underneath, and then leave to try.
That’s where Gel-a-Peel tested H’s patience! She’s generally a patient child, but often you have to leave it for up to five hours (or overnight) to dry. I found that taking the letters and shapes out of the mould after a few hours and leaving to try on the clear sheet helps too.
Gel-a-Peel is loads of fun! It’s quite easy to get through a tube though, so we’re already looking at buying some refills.
We received a textbook to decorate. I was curious – how would they stick on? This is the fun bit – you just get a tiny drop of the gel and stick it on that way. I’ll report back how long they’ll stay on for as right now we have only just done it.
If you look at the Gel-a-Peel website there are some SERIOUSLY impressive things on there – something to get stuck into in the future, I reckon!
H also decided to make her BFF a bracelet (drying time approx 4-5 hours). That was another Gel-a-Peel fun activity. It was also another patience test – doing one colour at a time then leaving it to dry for a little bit before doing the next bit. This morning the bracelet looks pretty cool – she just needs to make some BFF initials now (drying time approx 4-5 hours).
Gel-a-Peel is a fun, affordable activity. You can buy several different kits – head over here to have a look.
If you want a quick activity, make one of these fun bands – they’re a good starter project and get you used to how thick the gel needs to be. We’ve had two that have snapped, so H is spotting where the weaker bits are and improving every time!
The big thing for us came a couple of days later. This will teach me for not reading the packaging. Our Gel-a-Peel kit is GLOW IN THE DARK!! Therefore, everything H has made has become even more awesome – we may have spent far too long in the under-stairs cupboard looking at our creations. It’s really cool anyway, and I think H might keep that bracelet for herself now!
We received the Gel-a-Peel kit for the purpose of review. All opinions are our own. You can buy kits from Amazon over here.
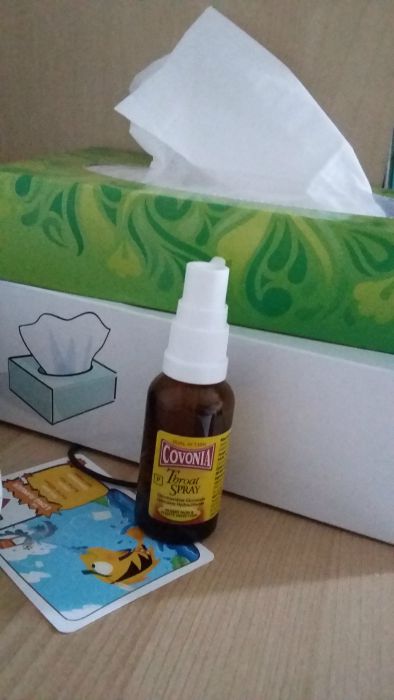
Sunday 2nd August. I had plans, so many plans. They fell by the wayside as the cold which had been threatening to knock me over, finally did. So I spent the majority of the day in bed while H went to her best friends’ party. It wasn’t much fun at all being home on my own. I lost my voice too.
Monday 3rd August. Which meant I took today off work. Too tired and my throat was puffed up so it hurt to speak. Although being at home alone actually helped as I had nobody to talk to, so my voice was almost back to normal by the end of the day. I still had to do important things like pick H up from school. Her first topic next term is castles, so we decided to make her box garden into a castle – quite easy when you have 7″ squares and kitchen roll holders and don’t have to think too hard about stuff. Phew.
Tuesday 4th August. H is at holiday club over the summer, so gets to have trips every now and then. Today’s was Build a Bear. They always have the two bears as choice, so I asked if it was okay to give a bit of extra money for her to choose a different one. That was fine, so she came back with a monkey. The monkey “does not look like Fran Kirby” I was reliably informed, and is now called “Harry Kane”. I’m not sure Mr Kane would appreciate being told he looks like a monkey, and I’m not about to argue with a five year old. She’s saving her money to buy Harry Kane an England shirt!
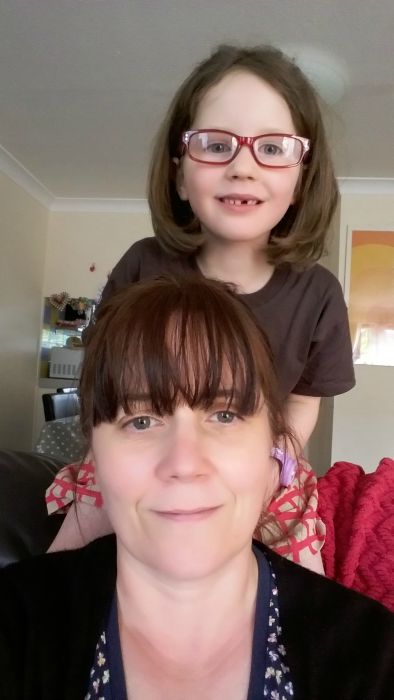
Wednesday 5th August. H made me “take a selfie” – I had no idea she even knew what one was. Possibly something she’s picked up at Holiday Club….
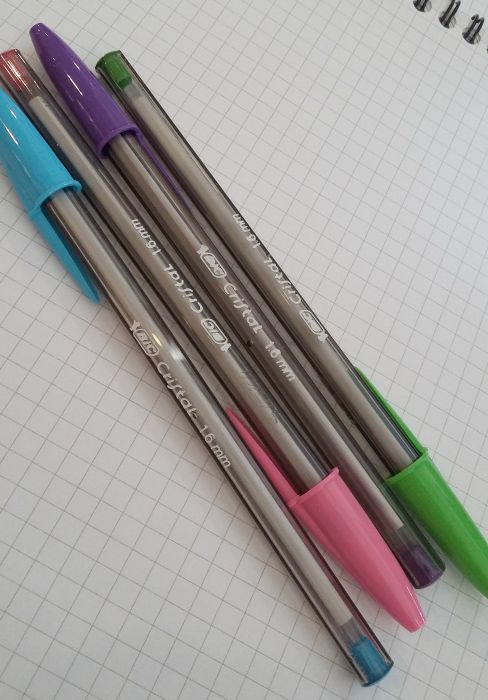
Thursday 6th August. We’re reviewing some Bic pens, and I’ve claimed these ones for my own personal use at work. Add that to the Smiggle highlighter which rubs out, and I’ve got a pretty good pen collection which nobody had better try get their grubby hands on! Yes, I have considered getting a safe for my stationery on my desk.
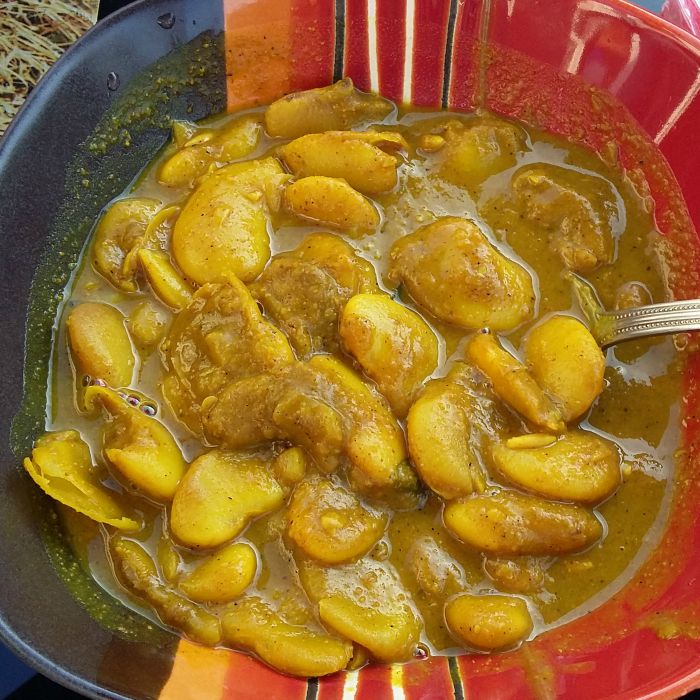
Friday 7th August. We had a playdate after school today, and had butter beans with a delicious mild curry sauce – really good too. I could have happily eaten the entire bowl – as could H!
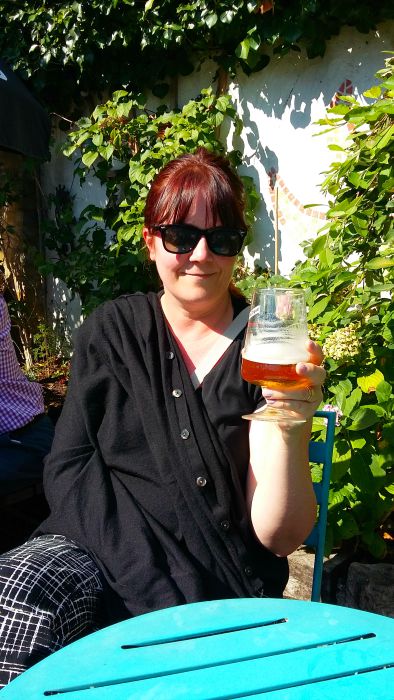
Saturday 8th August. H went off for the day and night on a sleepover, so Shaun and I went to the pub and had beer and stonebaked pizza. A good day!
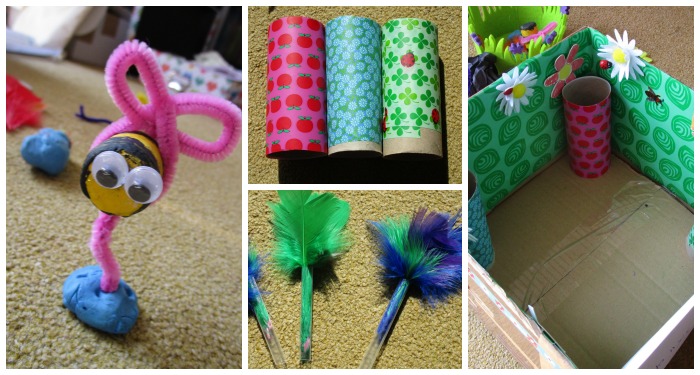
School gave us some Home Learning for the Easter Holidays – to make a Box Garden. So we decided to use a few bits from our craft tub to make it look like a garden. So far, the most fun thing has been the cork bees!
Cork bees are ridiculously easy. All you need are some corks (handy if you drink wine), some paint (black and yellow), a pipecleaner and some play doh to stand it up – and a couple of googly eyes.
First of all we painted the corks yellow and left it to dry overnight. We used Tiger Stores paint which covered the print on the corks really well. In the morning it was still a bit tacky, so I used a corn on the cob holder while we painted the black stripes onto the cork. After that they were left to dry overnight again. Get some googly eyes and stick two to the front of the bee. Then all you need to do is create the wings.
This is where the pipecleaner comes in – this is where I had to help H the most too. Wrap it around your fingers twice – these loops are the wings. Criss-cross them on themselves so they look kind of wing-like, and then just wrap the two ends of the pipecleaner around the cork, making sure there’s enough to create a stand. Then all you need to do after that is put it in some playdoh to stand up. It’ll now wobble around a bit like bees do, and looks jolly cute!
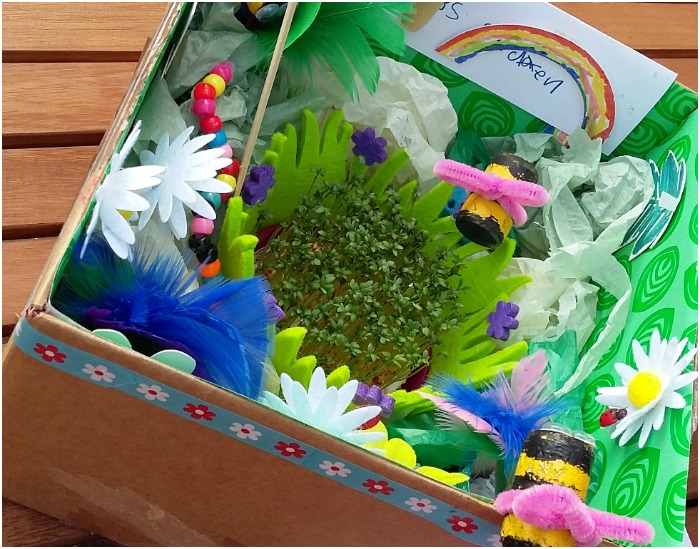
For the base of the Box Garden we got tissue paper and crunched it up, then found flower stickers, feathers, covered toilet rolls in sticky backed plastic and basically went crazy with decorating. We also added a caterpillar by threading beads onto a pipecleaner, putting a head on him and bending him to look sort of like a caterpillar crawling. It worked pretty well anyway, even if I say so myself!
In the middle is what makes it a garden – Tiger Stores had little basket type things for sale, and I picked one up a while ago. Inside the little basket is enough space for a shallow dish, which we put cotton wool in, and sprinkled some cress seeds on top of! Fully sprouted it looks like a very cute little crafty box garden – and while I’m sure we won’t be winning any prizes for our creativity, I LOVE THE CORK BEES!
Tiger Stores is one of my favourite craft supply shops – everything is at a good price, so today I made some easy bunting which involved minimal effort from me and still looks good.
Easy bunting is something I’ve had in mind for H’s birthday – and Tiger Stores have some cool things in stock at the moment, but I hadn’t had the time to start it.
Today I was ill from work and needed something to occupy myself without it being too strenuous, something which involved minimal effort but decent results.
So here’s my Tiger Stores Easy Bunting Instructions :
Buy the Karton cardboard triangles which are bunting shaped. There are 50 in total, in ten different colours. £2.
If you’re anything like me you’ll always have a stash of the sticky back plastic drawer liners Tiger do – they have various colours at £4 a roll. I always keep any pieces I might do something with, as even the tiniest amount works. I have four different patterns at the moment.
Other than that I picked up some Snor purple string (£1 or £2) to use for hanging them.
Step 1
Work out the letters you need and using the handy guides on the back of the sticky paper make sure they’re the same size. Cut them out and look out for the letters which will come out the opposite way (like p) – don’t forget to do those backwards (I forgot).
Step 2.
Take each card piece of easy bunting and sort them into the colours you want. There are ten colours; green, dark green, blue, light blue, pink, cerise, yellow, orange, red and black.
Step 3.
Sort out which letters you want on which colour. Peel off the backing and stick them on.
Step 4.
You’ll probably have bits of plastic sticky stuff left – don’t throw it away, use it to fix the card to the string at the back – it’s strong sticky stuff so should do the job.
Step 5.
Hang up and admire your easy bunting then have a long lie down afterwards.
Gulp. I’ve just read they’ve opened a BIG store on Oxford Street. Dangerous. For my bank balance, that is…
As part of our MoneySupermarket challenge to spruce up H’s room, one thing we wanted to add was bunting. Her room is a mish-mash of colour schemes, though decidedly yellower at the moment. She’s set to move back in there tomorrow, so tonight we need to get the walls decorated. Bunting was one of the obvious choices as it’s simple to do, or so they say.
H’s curtains are the girly bunting design you can get at Ikea, with blue, red, orange, green and light blue flags (1) – and with them being Ikea there was plenty of fabric left over, so I cut out a few of the flags – with about 1cm of hem around them, cutting a line across the bottom and diagonals across the top so they lie nice and flat. (2)
Then they just needed pressing to make it easier to sew.
As luck would (or wouldn’t) have it I managed to sew two on the machine (3) before I wasn’t able to thread the needle, so gave up – and did the rest with the invisible wonder-web type stuff you get at Ikea. There wasn’t a lot so I had to be careful, but there was enough to get two sections of bunting. I used what was left to then attach the flags to a length of ribbon I had saved. (4)
This is how it looks (5) it could be better in parts, and I put that down to me rushing things – but we have plenty of fabric so I could try again… if I find the patience from somewhere….
I found that putting some of Tiger’s fabric tape at the back helped the ribbon stay straight and strong and avoid getting twisted too.
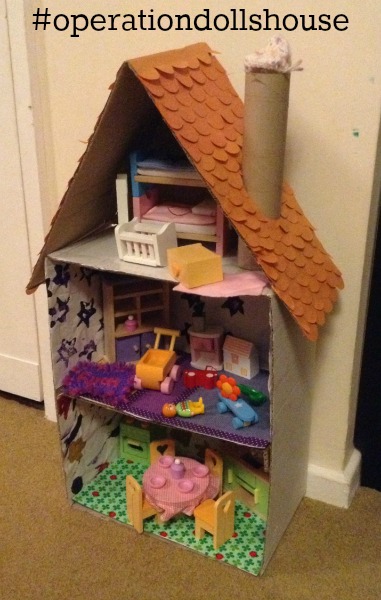
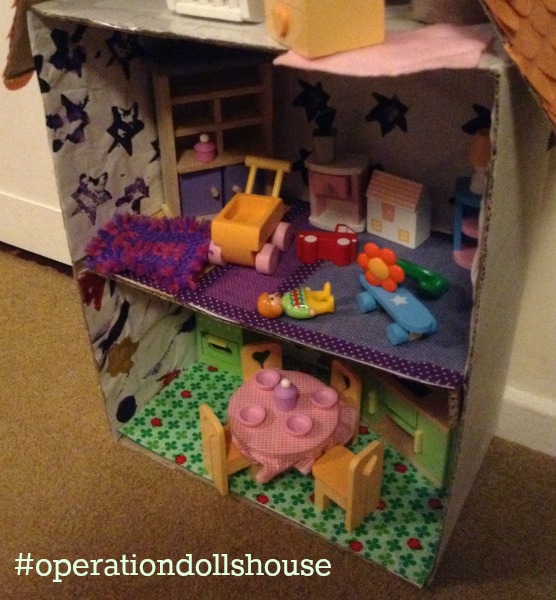
So last week we left the house as a shell which needed some personality, with gorgeous furniture inside but already Madam has decided she needs a bathroom. As luck would have it, she was ill on Monday still so Shaun stayed off with her and the two of them added paper to the inside of the house, and decorated the roof with orange ’tiles’. It reminds me of a kind of Dubrovnik orange – and looks fantastic.
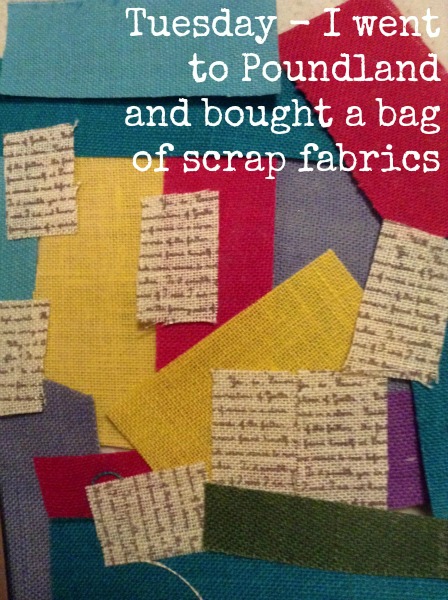
There wasn’t enough orange paper to go round so I had to head to Poundland on Tuesday for their bargain packs of paper and fabrics (£1 of course!) – where there was a matching shade as well as some fabulous scraps which have since been made into carpets for the houses.
Tiger Stores have some fabric tape in stock at the moment (for £2-3), as well as some really good sticky paper (£3) so I bought a few bits – and these were used on the carpets as it’s good strong tape but easily moved. The sticky paper I used on the other side of the carpet – both sides are on some light card which is just slotted into the house, mainly to strengthen but also in case H fancies changing the carpets – then she has two options for each floor; the scraps from Poundland or a design from Tiger! It works pretty well.
One thing H feels she’s missing is a bathroom – it was our local car boot sale today and I found someone selling some Le Toy Van pieces (including ones from the starter set!) but no bathroom bits – and anyway we need to build an extra room for that! We did get some chairs which will fit in well, there’s just no room (but now I’m thinking a roof terrace on top of the bathroom.. ha, I’m getting a bit carried away here…) – but this is the joy of making the house this way, you can do anything.
So right now we’ve fully papered walls, floors and the roof – but we’ve still the outside of the house plus the chimney to do, as well as the bathroom.. and I just found a bargain Le Toy Van set on ebay! We’ll see how things go… H may have to earn the set through good behaviour… (is that mean?)
I’m posting this up on behalf of Heather – they look fabulous!
Here’s what to do!
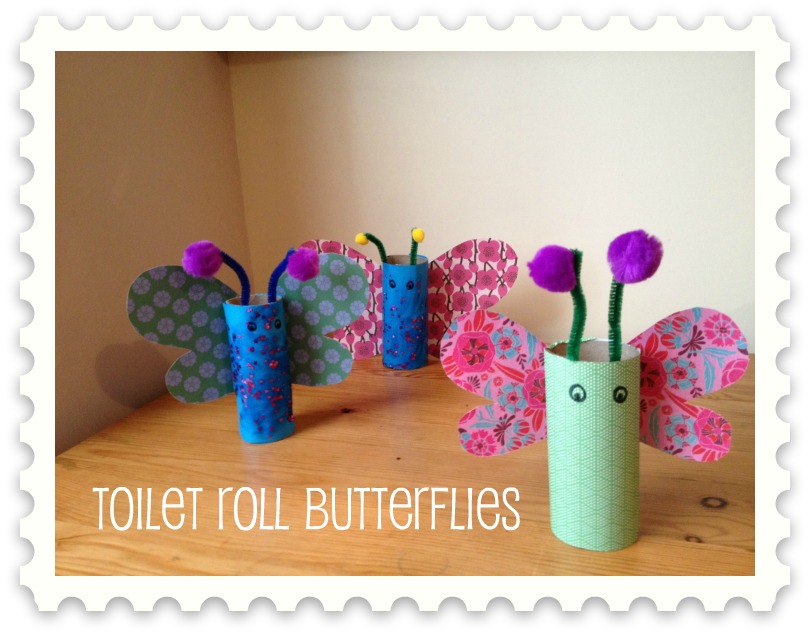
We had some toilet rolls kicking around for a couple of weeks as M has been collecting them – she’s had a bit of a thing, and wanted to make Mary, Joseph and baby Jesus characters as we’d seen them on a tv programme before Christmas.
I googled around and adapted them with things we had around the house – like pipe cleaners and fluffy bobbles for antennae, then experimented with different patterned paper from the crafty drawer, and some glitter glue pens for decoration!
M was really good with doing most of it with some help (like drawing the lines, glueing the paper on) – we ran out of plastic eyes (but they’d look really good too!) – but they’re really simple to do, I just stuck plenty of paper on the rolls – the wings are folded in half when they’re being cut to keep them symettrical, and away you go! Great fun!
Thanks Heather! I know what we’ll be doing this weekend…!
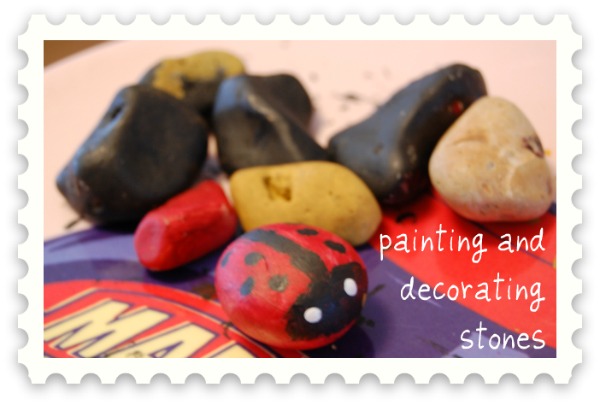
I don’t know about you, but every time we go anywhere H comes home with pockets full of stones. We were at home on Wednesday, our last day of the holidays before nursery and work kicked in again, so decided to do a spot of painting.
Painting stones, that is. It’s a really simple idea, messy enough it’s fun and allows your child (or you) to get creative.
I used watercolour paints (the ones in tubes) as they seem to take a better colour on the stones and wash off your hands easily. We did some one-colour ones, and some dual colour, and even a ladybird which was fun. (the large black one with red spots is H’s seal)
We’ve run out of our paints now, so I’ve more on order arriving next week, so here’s what we did the other day – and even better, we both worked on all of the stones. Now H has a train set to play with, we decided she should paint some stones golden, for the ‘Gold Rock’ station – now I’ve just got to build a station…
Peppa Pig, Ben and Holly and Friends at the NFT was an amazing event where we got to meet the people behind the voices on Ben & Holly’s Little Kingdom and Peppa Pig.
Peppa Pig, Ben and Holly and Friends at the NFT featured the works of Neville Astley, Mark Baker and Phil Davies – who of course are from Astley Baker Davies who make Peppa Pig, Ben & Holly’s Little Kingdom and The Big Knights.
It really was a whole day event – as prior to the start of it the foyer was set up with paper and tons of crafty things so you could make your own Peppa Pig mask (with a polystyrene cup and a paper plate!), or paint/colour in some Peppa characters on paper – or even design your own scene then make your own plasticine characters so you could then make a stop-start animation. There was tons to do, and even better it was free – you didn’t need a ticket for this part.
The part you needed the ticket for, however, was brilliant – Peppa Pig, Ben and Holly and Friends at the NFT meant everyone sat and were introduced to Astley, Baker and Davies who then chatted about the shows, answering questions from the audience as well as doing giveaways and prizes (H won for her drawing of Peppa Pig!).
We got to see three new Peppa Pig episodes – ‘Mr Bull in a China Shop’, ‘The Olden Days’ and ‘Grampy Rabbit on the Moon’ as well as a new Ben & Holly one which we can’t remember the exact name of, but it involves bees (and is very funny) – these episodes may not screen until December time, so that was a pretty ace exclusive! We also saw a remastered Big Knights episode ‘Clockwork Knights’ which went down well.
There was plenty of participation from the audience – they invited kids up to sing the Peppa song (H was too shy) and almost all the questions were asked by children.
Then the bit we’d really been looking forward to – the voices behind the characters Daddy Pig (Richard Ridings), Mummy Pig (Morwenna Banks), Peppa Pig (Harley Bird), Miss Rabbit (and Nanny Plum) (Sarah Ann Kennedy), as well as the narrator (John Sparkes) all came on the stage. Harley Bird who plays Peppa brought on her BAFTA that she’d won (first time I’ve ever seen one of those!) and they all chatted, swapping anecdotes and answering questions. Of all the voices, the most immediate were those of Richard Ridings and Sarah Ann Kennedy – both of whom have been voice-spotted while out and about.
Morwenna Banks, Richard Ridings, Sarah Ann Kennedy, Harley Bird and John Sparkes – the voices of Peppa Pig (and Ben & Holly)
So, what did we learn? A days work at Astley Baker Davies results in seven seconds of a Peppa Pig episode – but that can be several episodes at the same time. They’re done in batches and then sent – so the ones we saw today were only very recently finished.
Brian Blessed says too many swear words for him to attend today (which I think is very funny), and a lot of the stories that involve his characters are based on anecdotes he’s told while recording his parts.
The Big Knights wasn’t a massive success – and Astley, Baker and Davies all realised it was due to them not targeting the animation and knowing who their audience was. They went back to the drawing board (so to speak) and had a re-think, knowing they needed a family with a mum, dad and two children… fast forward and Peppa Pig was born!
The parts are recorded ahead of the animation being made – rather than afterwards like you might assume. I’m not sure if they were joking, but they did say it’s the first time they’ve all been in the same room together!
There are no plans for a Peppa Pig film as they don’t want to mess with the five-minute format (hurrah!), but they are working on a Big Knights film. The Big Knights was shown on the BBC, there are thirteen episodes and it has recently been updated and remastered so it’s suitable for our televisions these days – and has been recently brought out on DVD.
Ben and Holly’s Little Kingdom is fun for them to work on, as Peppa episodes feature things that have happened or have been dreamt about, whereas with magic you can do anything which gives them a much broader start to work from.
That’s about all I can remember. Peppa Pig, Ben and Holly and Friends at the NFT was great – considering you had a lot of very young kids there, attention spans weren’t too bad – it started with chats, a quick episode, then more chats – and it flowed well. When the kids didn’t really want to listen to the talking, the characters on stage was interesting – H still can’t quite get her head around Nanny Plum and Miss Rabbit being the same person’s voice.
The actors (voice actors?) on stage all introduced themselves in their character voices, and we found out that quite often they’ll try different accents for different characters – Morwenna Banks gave us a quick Madame Gazelle (alas no Bing Bong Song), and the narrator John Sparkes is also the voice of Mr Potato – as well as several other characters! (which he did for us).
You could see how much everyone enjoys working on the shows (which are made in the UK, in their offices on Regent Street) – and how they’re not running out of ideas – there’s always something to write about – the original Peppa, Lily Snowden-Fine’s mum told them a story which was made into an episode – which I think is brilliant! Imagine that – an everyday event becomes a kids tv episode – how cool?
The BFI hold monthly kids events – and we’ll be on the lookout for more – this was a great event – we were in the NFT from 11am until around 4ish which is quite a long day – but there was so much to do that time flew by. I’d highly recommend it and will be going again.
The Big Knights
Disclaimer – I was given free tickets for this event, but this was down to taking too long to buy them rather than for the purpose of review. Thankyou to Liz at the BFI for all your help!
H just had her third birthday, and between two of us we got her a decent Hama Beads set – a large tub of beads (the Maxi ones) and a starter set which The Entertainer had at half price (£9!).
Shaun’s Hama Beads Clown
Hama Beads are a simple concept. You’ve a clear base you put the beads on to create pictures – and once you’ve finished and it’s done, simply get a hot iron to it and press down (using a sheet of paper provided) for a few seconds – and wait for it to cool.
Once cooled, you can check it has set properly and peel it away – leaving a colourful beaded pattern in whichever shape you chose!
Hama Beads heart by me
Packs come with some stands too – so if you wanted you could have your creation stand up. We had a rainy, stormy Saturday so got the kits out – and found that rather than supervising H, we were all hooked and making our own creations (especially Shaun).
H’s dinosaur
The best bit of all? It was something we could all sit down and do together – and we enjoyed ourselves. The maxi beads are suitable for children aged 3 years and up, the midi beads from 5 years (they’re a bit smaller) and then regular Hama Beads are suitable from age 7. I spotted Ikea do similar kits as well, though in the smallest size (and I’ve no idea what kind of quality they are, or indeed if they’ll mix with Hama Beads)


")


